Miller loves playing on his xbox, it’s his favourite thing to do and as responsible parents we try to limit this time. He gets to socialise with friends fighting through rounds of Fortnite or teaming up for galactic battles and fast car races. Our main issue with the damn machine is that he seems to get very loud and angry whilst using it. He has headphones with mic which makes it hard to hear himself and although I don’t personally think he’s angry. He sounds that way when speaking with his friends and trying to get them into covert situations.
We splashed some red paint onto his chimney breast when we first moved in and that was it. His room is always messy and cluttered and was starting to look dated and not in keeping with a boy heading towards his teens.
He didn’t have any preference on colour or theme, so I started trawling pinterest for teenage boy bedroom ideas. They all seemed to be blue or grey which I was trying to steer clear from, so wasn’t to helpful. The primary colours seemed childish and we had done these to death when he was a toddler. The majority of the house has grey overtones, so wanted to steer clear of these if I could help it. I painted the whole room white, I thought I’d get inspiration with a blank canvas and I was right. The geometric feature wall idea was formed.
I decided on the green colours due to 3 reasons
- Green colours promote calm and serene feelings whilst still bringing a fresh vibrancy that elevates it up the excitement scale above the more tranquil and subdued blues – This is the Google definition – lol!
- His Xbox – the logo is green.
- He tends to Hulk out when angry
I watched a youtube video on how to do paint a feature wall and got started straight away.
Tools we used…
- Masking tape – we used Frog tape from B&Q which leaves clean lines and protects the paint beneath.
- Paint in numerous colours – we chose quite a lot of colours although many people use 3 or 4 colours. We didn’t spend a bomb but purchased tester pots by Vaspar. We picked the colours from the paint swatches and watched them make it up, which was super fun
- Brushes and Rollers – I highly recommend purchasing a mini roller tray for each colour you will use. We did not do this and used 3 roller trays meaning we had to wash them between coats and colours.
Starting off…
Its super handy to have a quick sketch on paper before attempting the wall as it gives you a general idea of what you are hoping for and where to tape. You then attach the masking tape to the wall in the design you like. Making sure the tape is stuck well with no bubbles because you definitely want those sharp edges. With the frog tape it advises you use a damp cloth and go over the tape before painting and after it is all down, we did this.
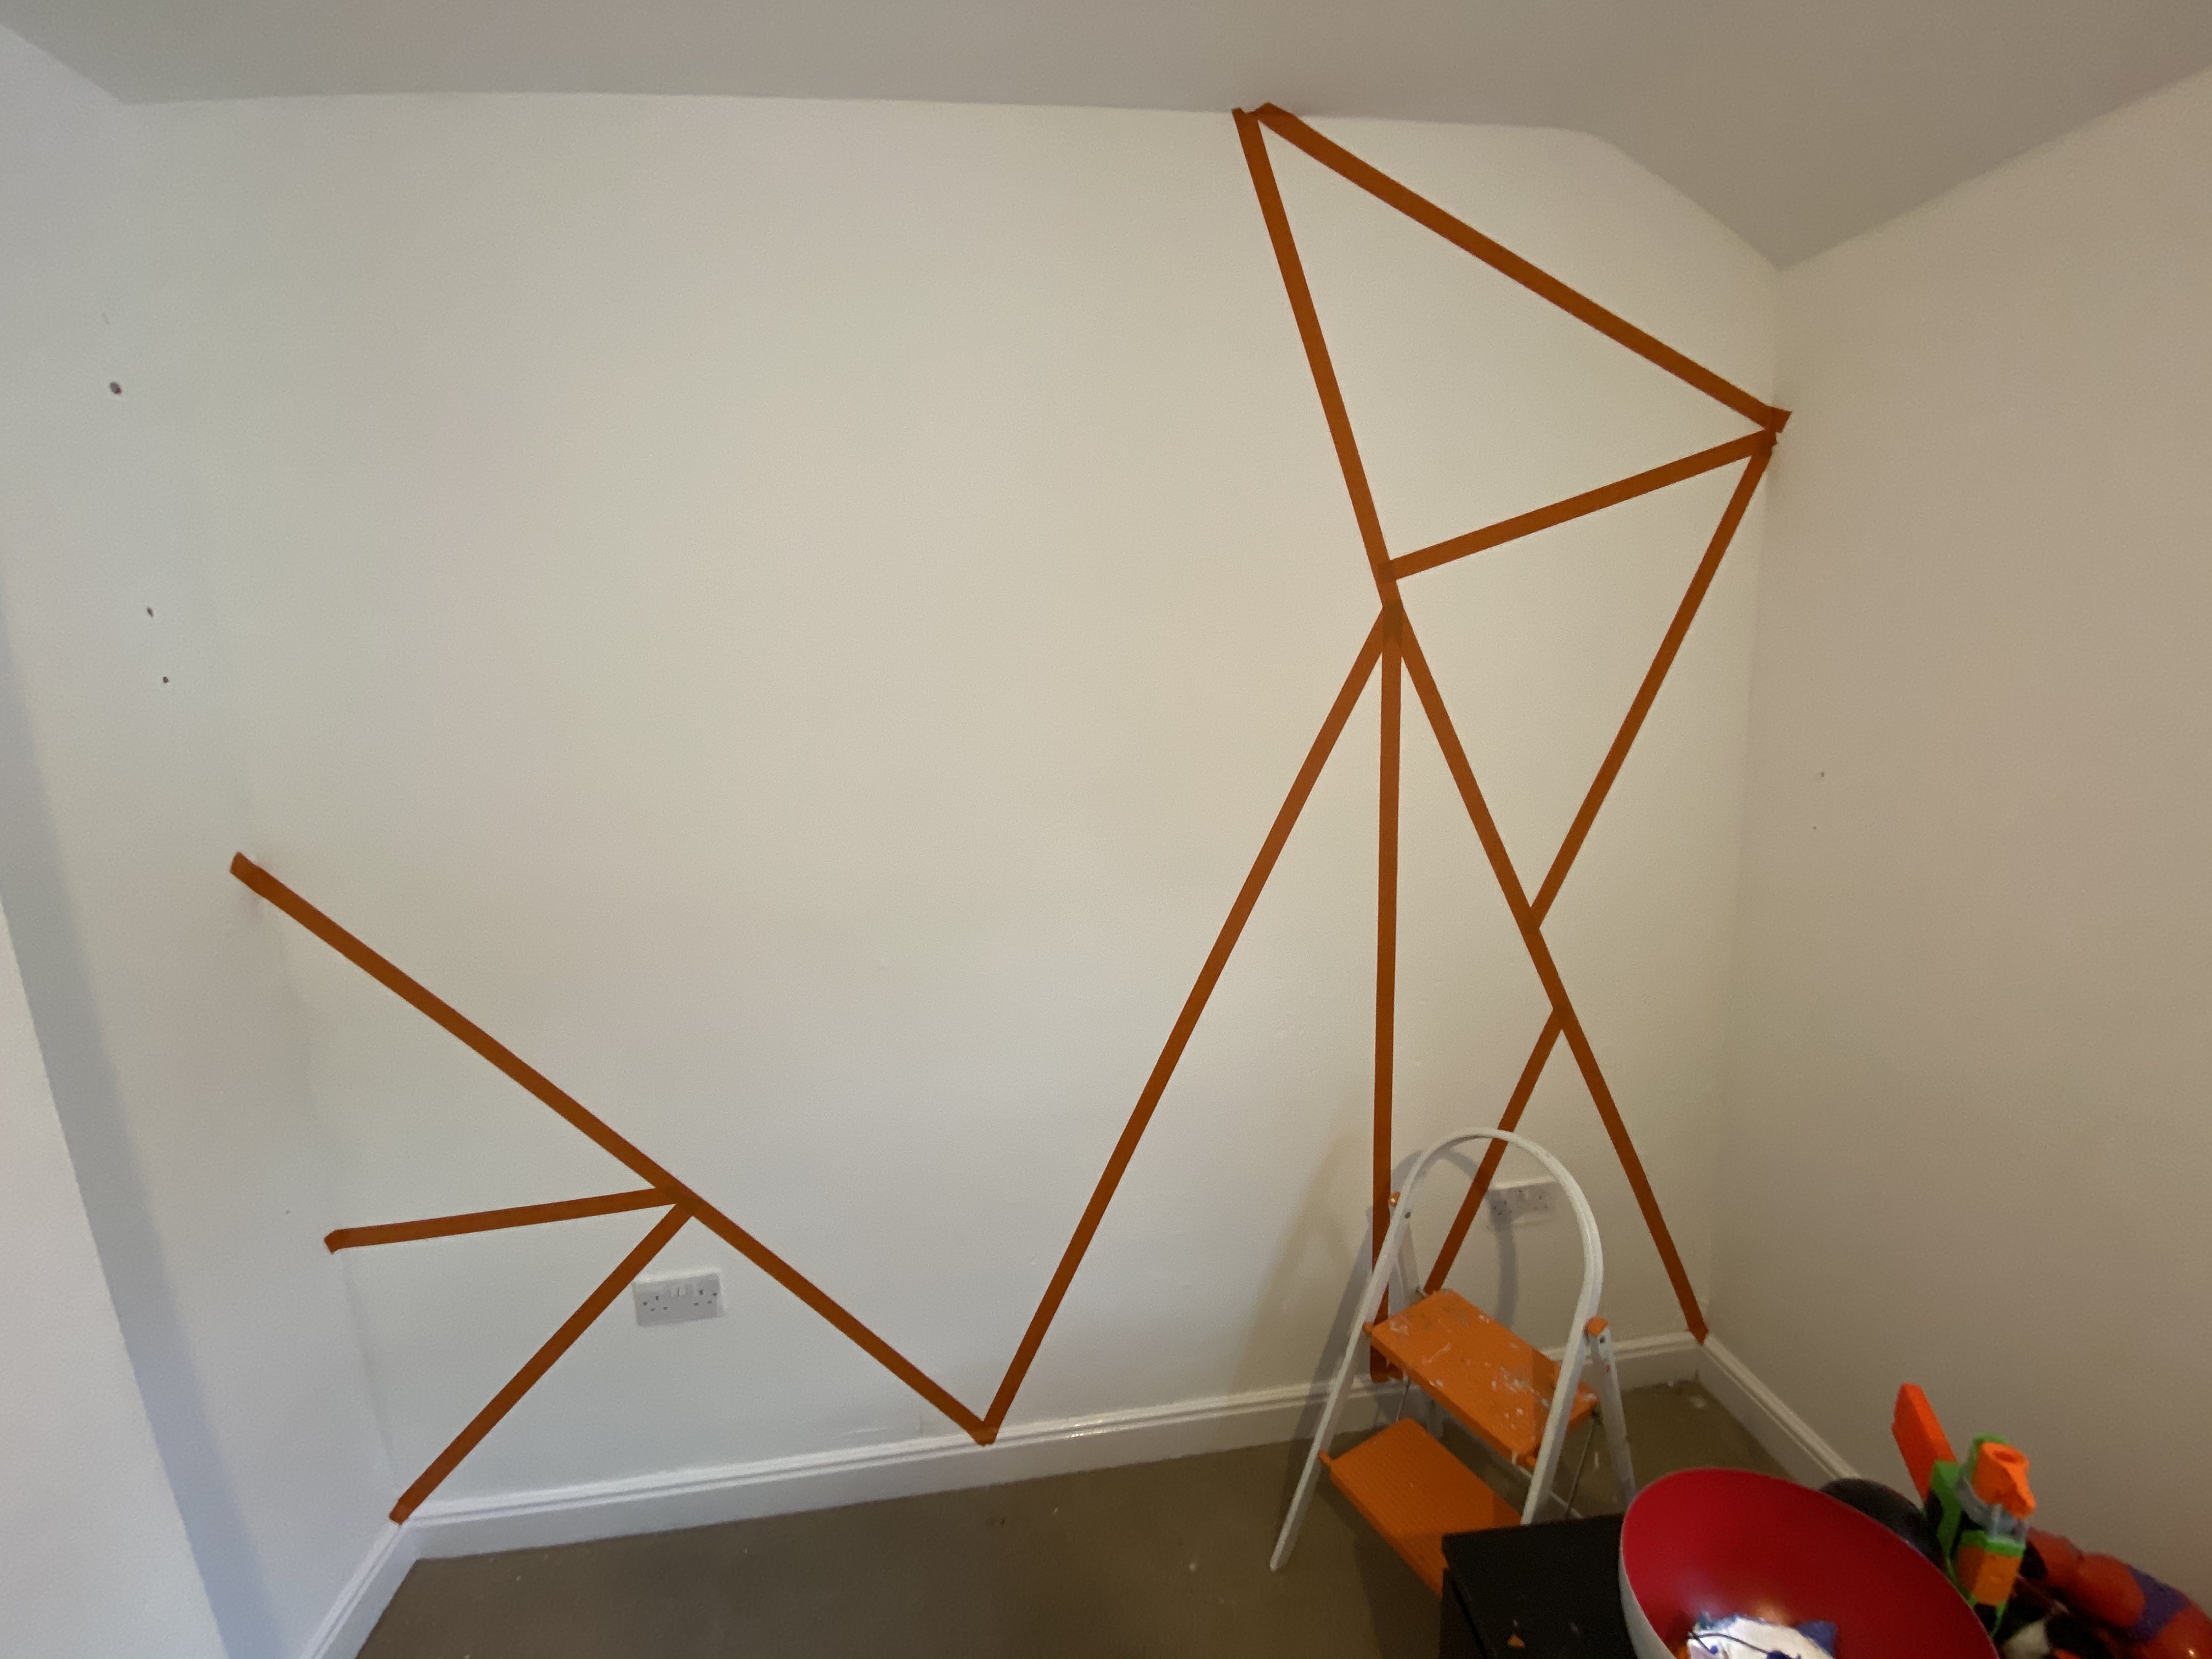
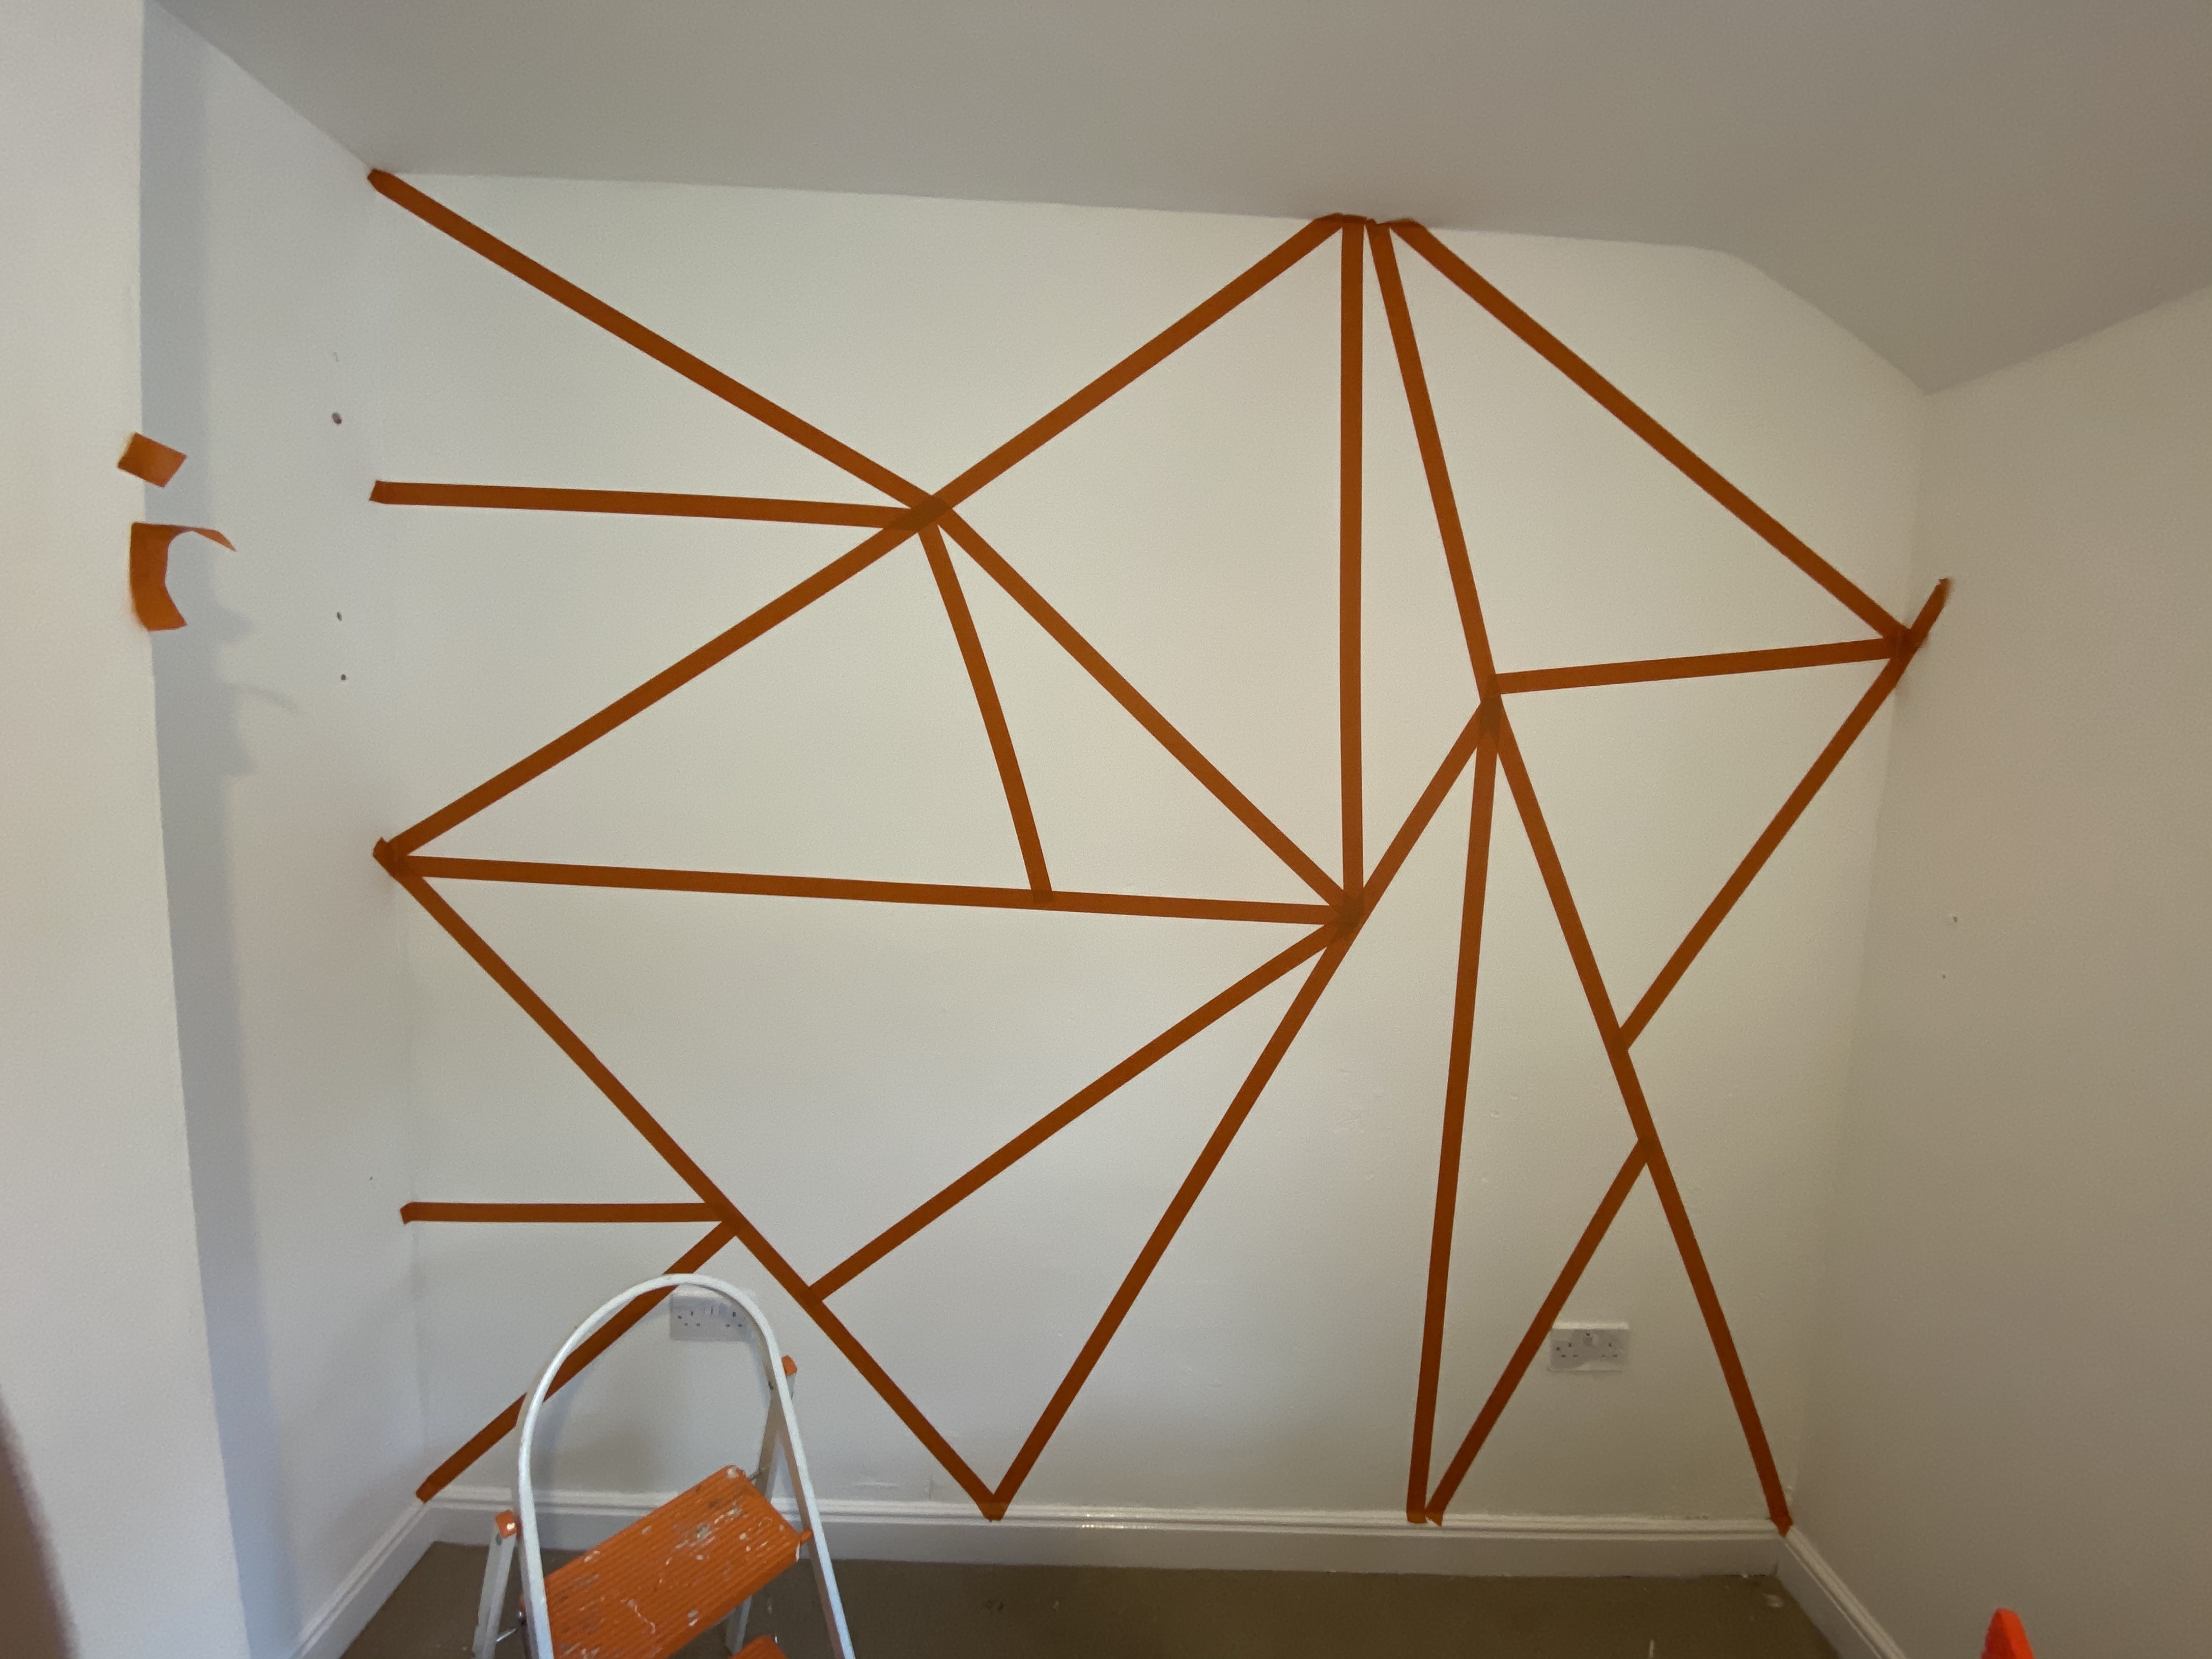

Then the painting can start! Yay! – I numbered my tester pots and my triangles to make it simple and like a paint by numbers. This is where you need to work quite quickly with a good coat or two. It’s a good idea to peel the masking tape off when the paint is still a little wet – Just pull slowly and it should all start to peel off without taking the paint with it.

Green is Go.
I loved the affect and the fact you get a completely unique wall. If I had to do this again I would however put tape around the edge of the wall to create a white border around the design as the ceiling isn’t a sharp enough line as I would like. There is always time for me to do this at a later date.
I also used the left over paint to revamp an old mirror we had in the attic from my old uni days. It was a purple glitter frame and after a coat of primer and the lightest green coat, I cut up a sponge and used the other colours to create a sponge camp effect. I finished with a coat of high sheen varnish to protect.

Green sponge triangles 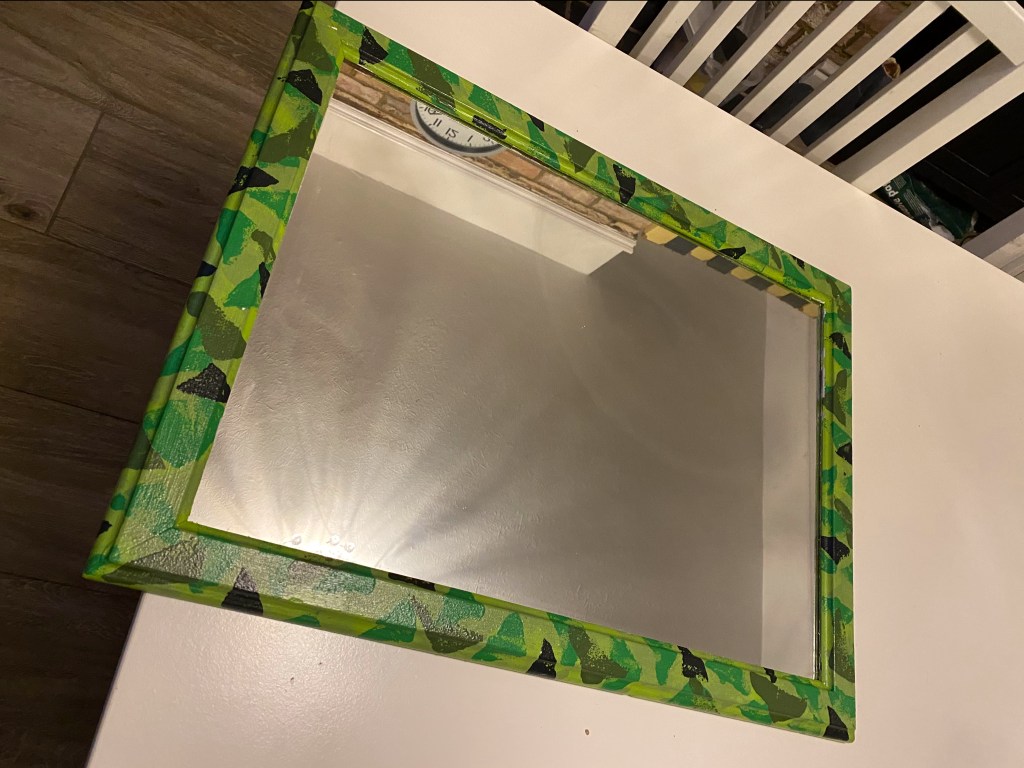
Now to put it on the wall
I’m quite happy with the effect and Miller’s happy he can have a primping station in his room. I have a few finishing touches i.e. LED lights and artwork to add to his bedroom and I will upload the finished result soon…
